Pencil drawing by PencilHB |
D E U T S C H | E N G L I S H |
Famous painting - Friedrich
|
Share this drawing |
|
|

December.10.2013 DIN-A3 16.5 x 11.7 inch
Description
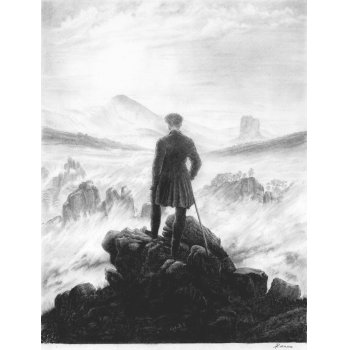
Wanderer above the Sea of Fog
Artist | Caspar David Friedrich |
Title | Wanderer above the Sea of Fog |
Date | 1818 |
Period | Romance (Romantic landscape painting) |
Technology | Oil on canvas |
Dimensions | 98 x 74cm |
Location | Art gallery Hamburg |
If you increase the brightness of the original image on the computer, you recognize that there are many cracks in the color-areas. Especially in the dark areas, this is extremely striking.
Partially I couldnt distinguish the shades of gray in the dark areas (because of the cracks).
I am not familiar with oil paintings, but probably this 'change' comes from the aging of the color or rolling of the canvas (or both).
Background informationen
Friedrich apparently has often painted rear views of people in front of landscapes. It is said, here he has even put himself in the limelight. So this is officially a self-portrait (was it a shortcut for a detailed portrait  ).
).
On purpose the person is placed in front of the vanishing point, so that a viewer would involuntarily place himself in the position of the figure and even look at the nature, as if he were standing on this cliff.
The rock formations apparently really exist, but are not together (they are in different places of Germany).
Curiosities
- 2011 is a stamp appeared with the painting (55 cents).
- There is a rock music group that has used this painting as a cover.
- On the Internet there are a lot of photomontages with this painting.
About the drawing
Again it was very interesting and a lot of fun.
I suspect that I have drawn some of the color-cracks (sometimes I was not sure if 'this line' was actually painted)
The shades of gray in the sky are so light that I needed daylight to complete my work (well, I dont have a good lamp ). When the light in the evening was bad, I could hardly distinguish the graphite-shades from the gentle waves in the paper (I often have used the eraser, but without success )
top
Steps
top/left predrawing (pencil)
top/right blackshading (pencil)
bottom/left softshading rough (graphite-powder with fingers)
bottom/right softshading smooth (graphit-powder with folded paper)
bottom hardshading (pencil)
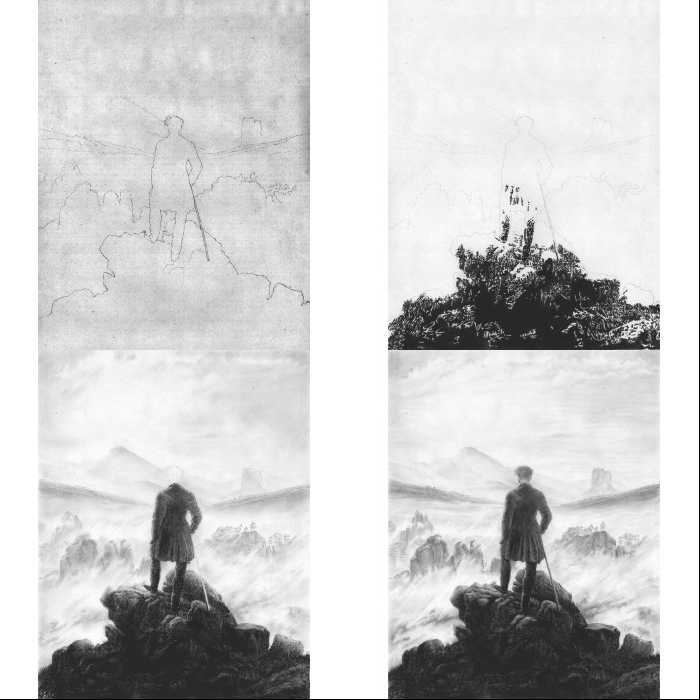
final drawing
Tools/Material
| Paper | normal printer-papier (DIN-A4...A6) normal sketchbook paper (DIN-A3) |
| Pencil HB | for pre drawing, fine lines, area-darkening and graphite-powder |
| Eraser | (2 x 2 x 0.6 cm) for area-lightening |
| Eraser | (small - at the end of a pencil) to smear graphite-powder |
| Sandpaper | to produce graphite-powder with the HB-pencil |
| Paper handkerchief | to smear graphite-powder or for blurring (wide areas) |
| Finger | to smear graphite-powder or for blurring (middle areas) |
| Pen with bicycle tube | to smear graphite-powder or for blurring (small areas) |
| Cardboard | to smear graphite-powder or for blurring (tiny areas) |
| Eraser-template | simple construction with a gap (1 x 30mm) |
| Eraser-template | simple construction with a gap (1 x 2mm) |
| Extra papers | to protect areas |
Version March.15.2015
Copyright (C) 2014 by SEA
Software-Entwicklung Aichinger